Posted on

A Guide to Primers and Supports for Oil and Acrylic Painting!

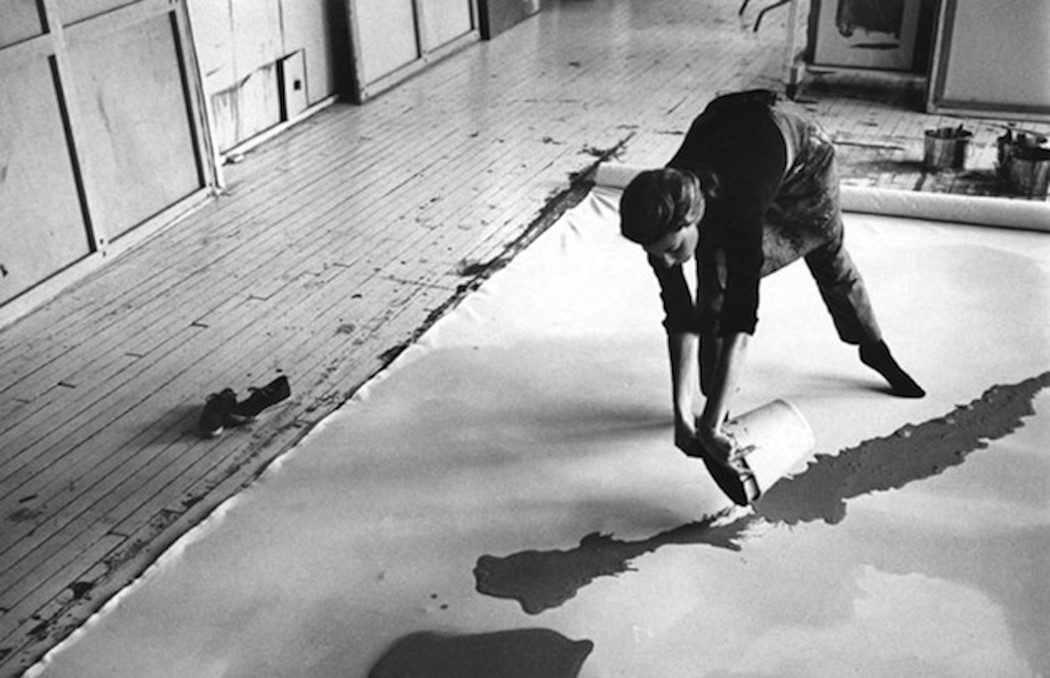
Pictured is Helen Frankenthaler in her studio

For a long, long time oil-primed linen was the go-to painting surface for painters. This all changed in the mid-twentieth century when acrylic paint was invented and began to be used on a surface of acrylic-primed cotton. Within a few years, this combination of cotton and acrylic primer, which made for a cheaper alternative to oil-primed linen, quickly became the most popular and commonly found form of painting support in art shops across the world. Due to this the tradition of painting on oil-primed linen has become slightly more niche. Due to the dominance of acrylic-primed cotton today, there is some feeling that the benefits of painting on oil-primed linen are being forgotten, so this blog will hope to address that and encourage you to give oil-primed linen a go if you haven’t already, whilst also reconsidering primers and supports as a whole.

THE SUPPORT

The material upon which an oil or acrylic painting is executed is divided into two parts, the support which is the cotton or linen, and the actual surface which is the primer. We’ll first look at these supports.

COTTON

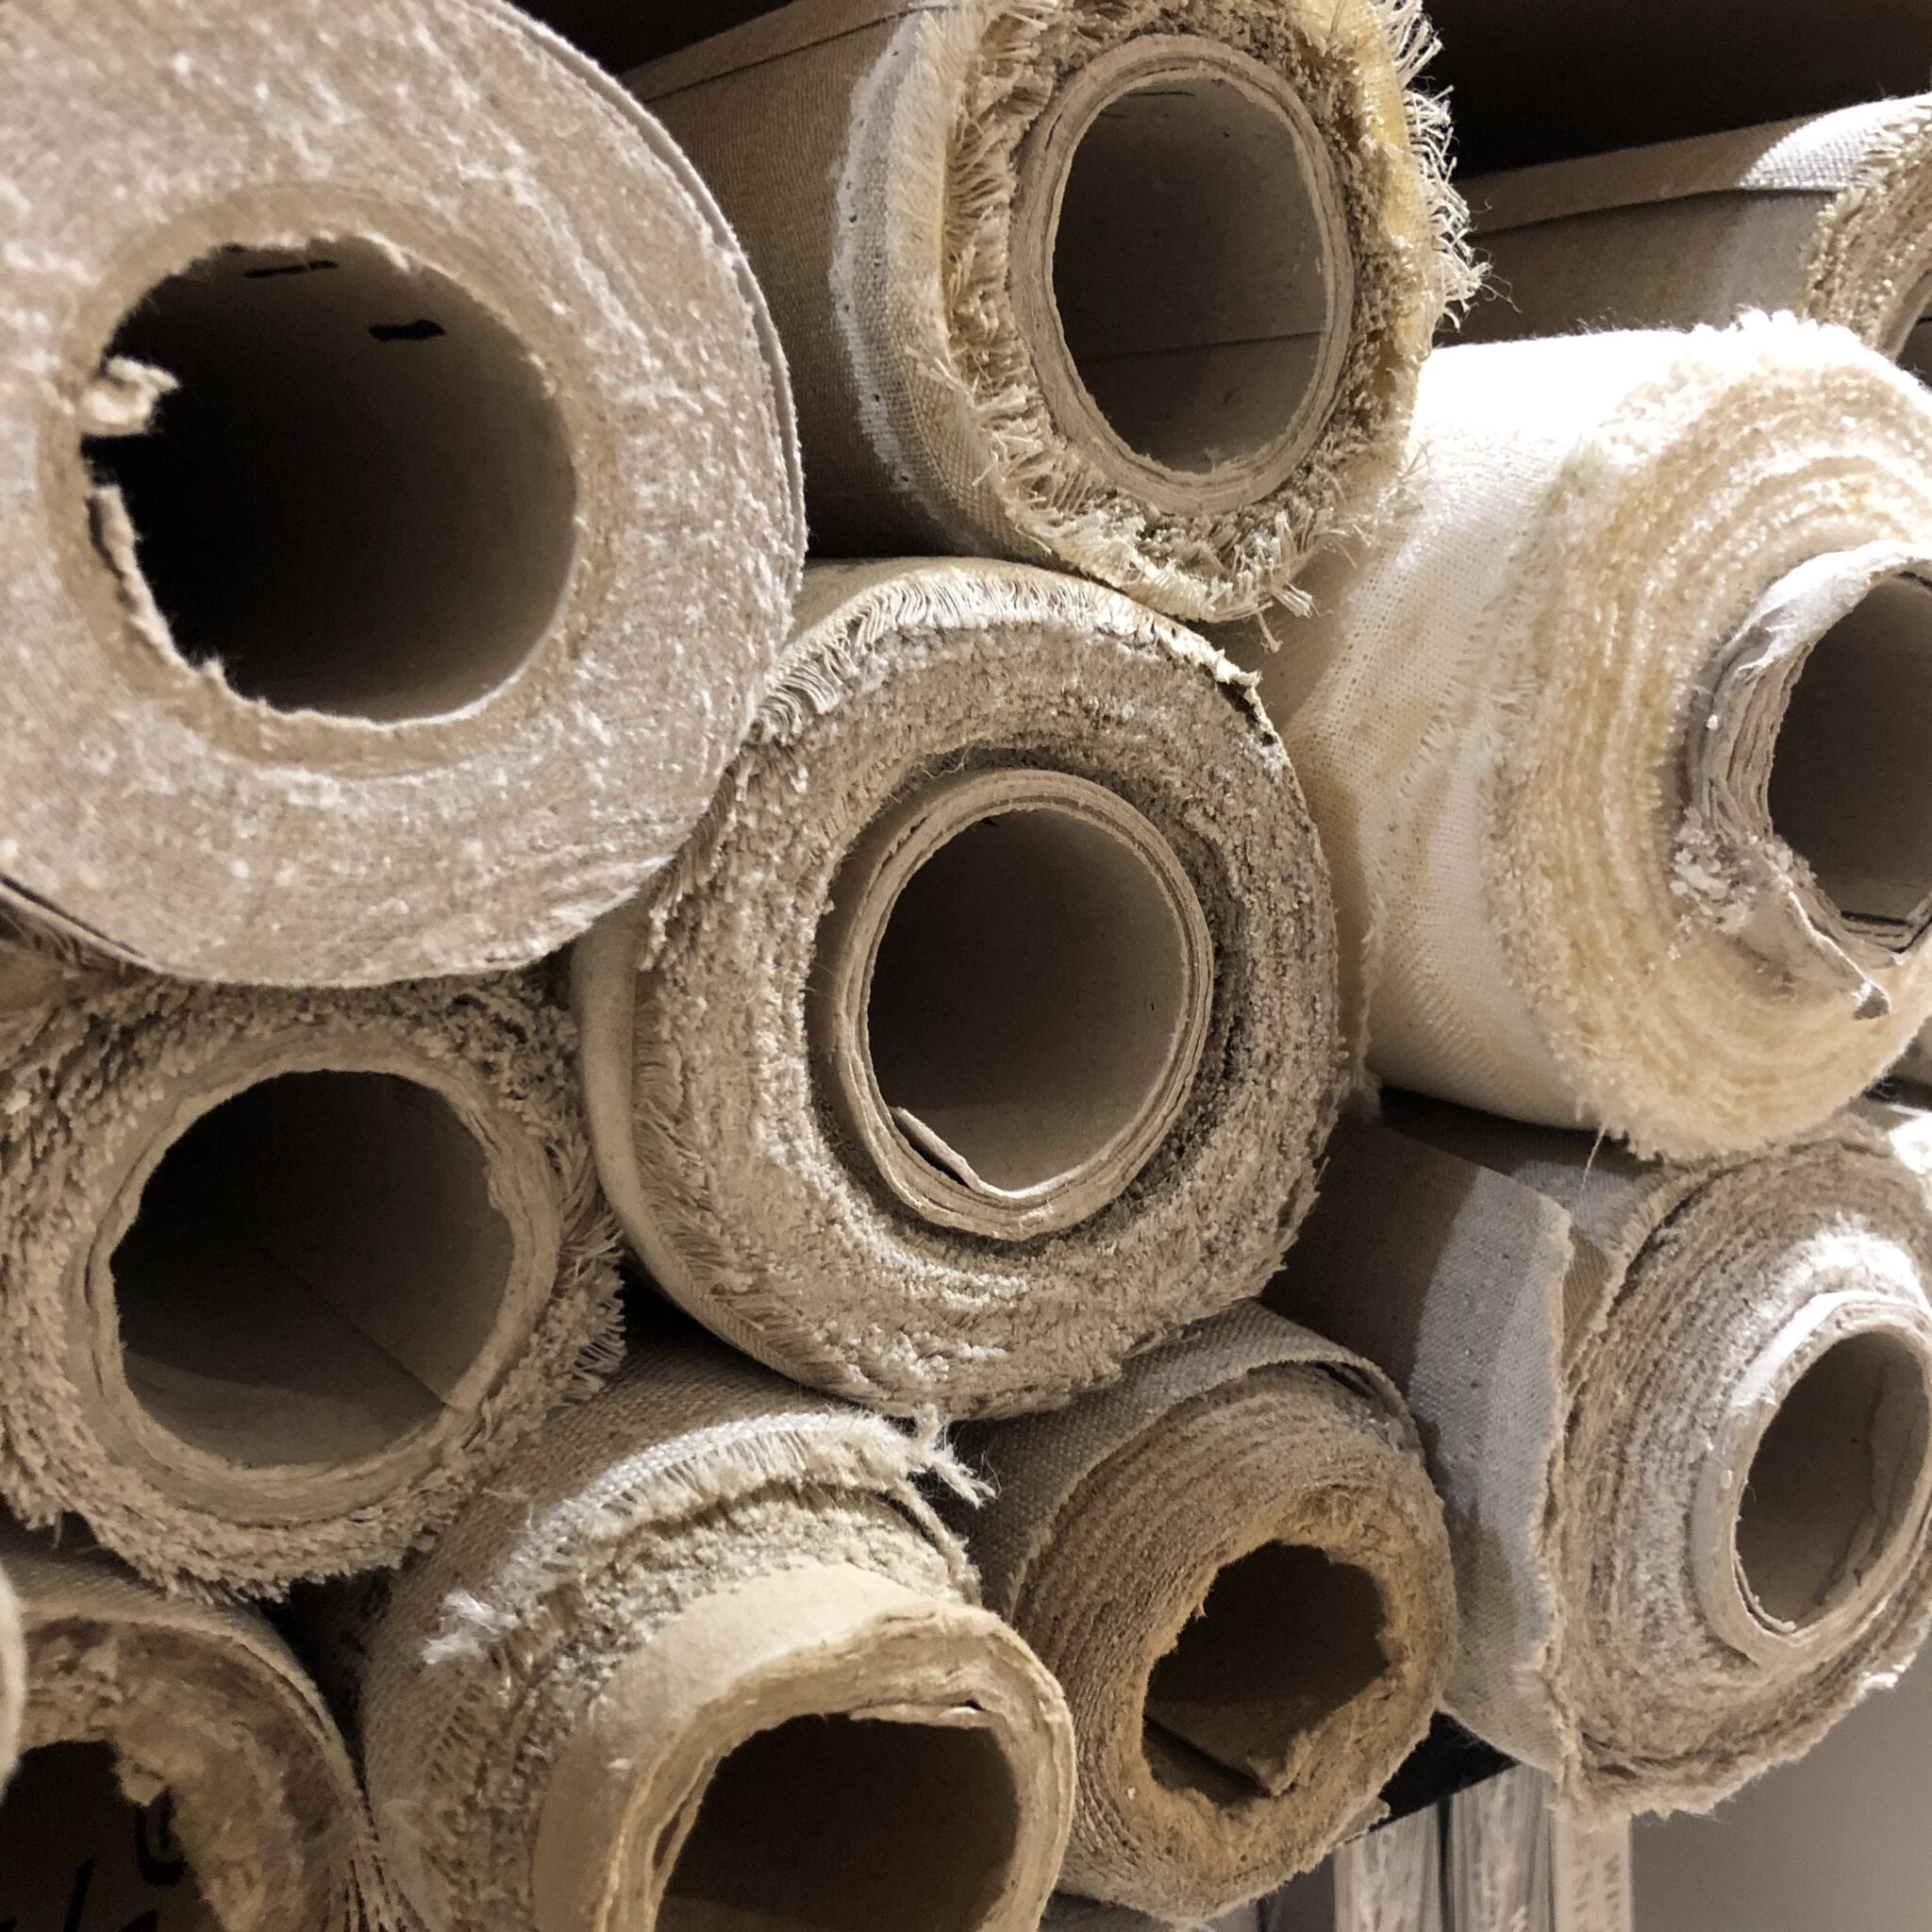
Cotton duck, as it is called in art shops, is made from the cotton plant and it’s nice, soft, and fluffy lil’ fibres. “But why is it called cotton duck?”. The term “duck” can be traced to the Dutch word “doek”, which means a linen canvas once used for sailors’ trousers and jackets. “Cotton” has since been added to modern duck items simply to distinguish them from traditional linen duck, though of course, you will note, no one really calls linen “duck”. Cotton is widely produced being grown across Africa, the Americas, and India. Being so widely produced, it is much cheaper than linen which is made from the flax plant nowadays mainly grown in Belgium, where labour is more expensive. Importantly, being cheaper, does not necessarily mean it is an inferior item.

The texture of cotton is regular and consistent, slightly bobbly, some might say it seems a little flat and mechanical, and it comes in a variety of weights too – on the roll at Green and Stone, it is available in 9oz and 12oz. 12oz is generally preferred as it is stronger and has a tighter weave. Importantly, even at 12oz cotton duck canvas is generally thought to be not as strong and durable as linen, although it is still extremely stable. The regular texture of cotton weave produces a fabric that is easy to pull in opposing directions. There is some disagreement over whether this means cotton is better or worse for stretching. Ralph Mayer, a fairly old school but extremely well-informed expert on all things art materials said it ‘stretches poorly; and is ‘entirely inferior to linen’. On the contrary, another writer says that cotton, being more elastic than linen will stretch more beautifully as its elasticity means it will not sag or wave whereas linen, being made of flax, which is a more rigid fibre, is stiffer and if stretched badly can pucker and has to be re-tightened again. However, because cotton is not as strong as linen, from experience, I think I have seen many more easily dented and torn cotton canvases than linen ones and I think this is one of the problems Mayer is hinting at.  I think the thing to conclude here is that being more elastic cotton canvas seems easier to stretch and is more forgiving than linen, so if you are a beginner it is good for practice as its cheapness means you won’t make any expensive mistakes. This is in contrast to linen which requires good stretching technique. When stretched properly, linen is undoubtedly stronger and longer-lasting and if it needs re-tightening that isn’t difficult – just wack in some wedges.

The cheapness of cotton, being on average about a third of the price of the same amount of linen, is one of its key advantages for the painter, as it can be used for countless sketches, studies and full-scale paintings without breaking the bank. The colour of cotton is another quality some painters like. Cotton has a lovely soft cream colour which when painted on without primer can really add to a painting (more on this at the end).

LINEN

One of the things people love most about linen is its bold texture which is irregular and natural looking, and because of its use over the centuries, it is more easily associated with great paintings created throughout history. Is the love of this unique texture just a case of linen snobbery as some have suggested? I have no doubt the texture of linen is more characterful than cotton – it certainly adds an additional voice to your painting, especially because it comes in such an array of textures, from the smooth which is popular for portraiture to very rough, almost hessian like texture (think Walter Sickert). There is a sense of organic craftsmanship in its making that is not there in cotton. The other good thing about linen is that, like oil primer, it has been used for centuries, and so we know it is going to last, and last well. Legend has it that linen canvases stretched on wooden frames were first used for paintings of religious subjects to be carried through the streets of medieval Italy, and from there came everything else. 

One final point to note before looking at the difference between the primers is that arguably, the cost of linen compels the artist to make a great painting, or at least put more effort into it. Also cotton, being cheap, will often (not always) come with a low quality prime, and so a linen, being expensive will come with a high-quality prime. There would be no point in putting a bad quality prime on a beautiful piece of linen. 

Variation on Peggy 1934-5 Walter Richard Sickert 1860-1942

THE PRIMERS

So, now onto the primers. The general rule of thumb is …

YOU CAN PAINT IN BOTH OIL AND ACRYLIC ON ACRYLIC PRIMED CANVAS

BUT 

YOU CAN ONLY PAINT IN OIL ON OIL PRIMED CANVAS

Of course, you might be an unruly sort of artist who doesn’t care for these rules, but beware you are risking the longevity of your painting!

ACRYLIC PRIMER

The great thing about acrylic primer, just like cotton, is that generally speaking it is cheap, and the second thing that is also great is that you can paint acrylic paint on it which a marvellous medium in itself, which is good because, like I said earlier, you can’t paint acrylic on oil primer, because it will flake off – it is quite literally like mixing oil and water, although confusingly you can paint oil onto acrylic primer because of the absorbency of acrylic primer. As well as being cheap it is easy, non-toxic, and generally odourless, this is because your dilutant is water and the drying time is quick, unlike oil which requires solvents for cleaning and a long drying time.

Sadly, because acrylic primer is generally made cheaply, the quality isn’t always the best and so the most common complaint about acrylic primed cotton, usually when painting in oils, is that acrylic primer is too absorbent. Being too absorbent acrylic primer can make oil paintings dull by drawing in all the oil, leaving flat, lifeless paint surfaces. I think this is another reason why Ralph Mayer was so disparaging of acrylic primed cotton. Thankfully, the problem is not insurmountable. Michael Harding has specially formulated a non-absorbent acrylic primer which has just enough tooth to be able to create a strong bond between the applied layers of paint. With this primer your colours will not sink and will look as fresh as they did the day you painted them. This primer is especially top notch because it can be painted over cheaply primed canvases to render them totally swish!

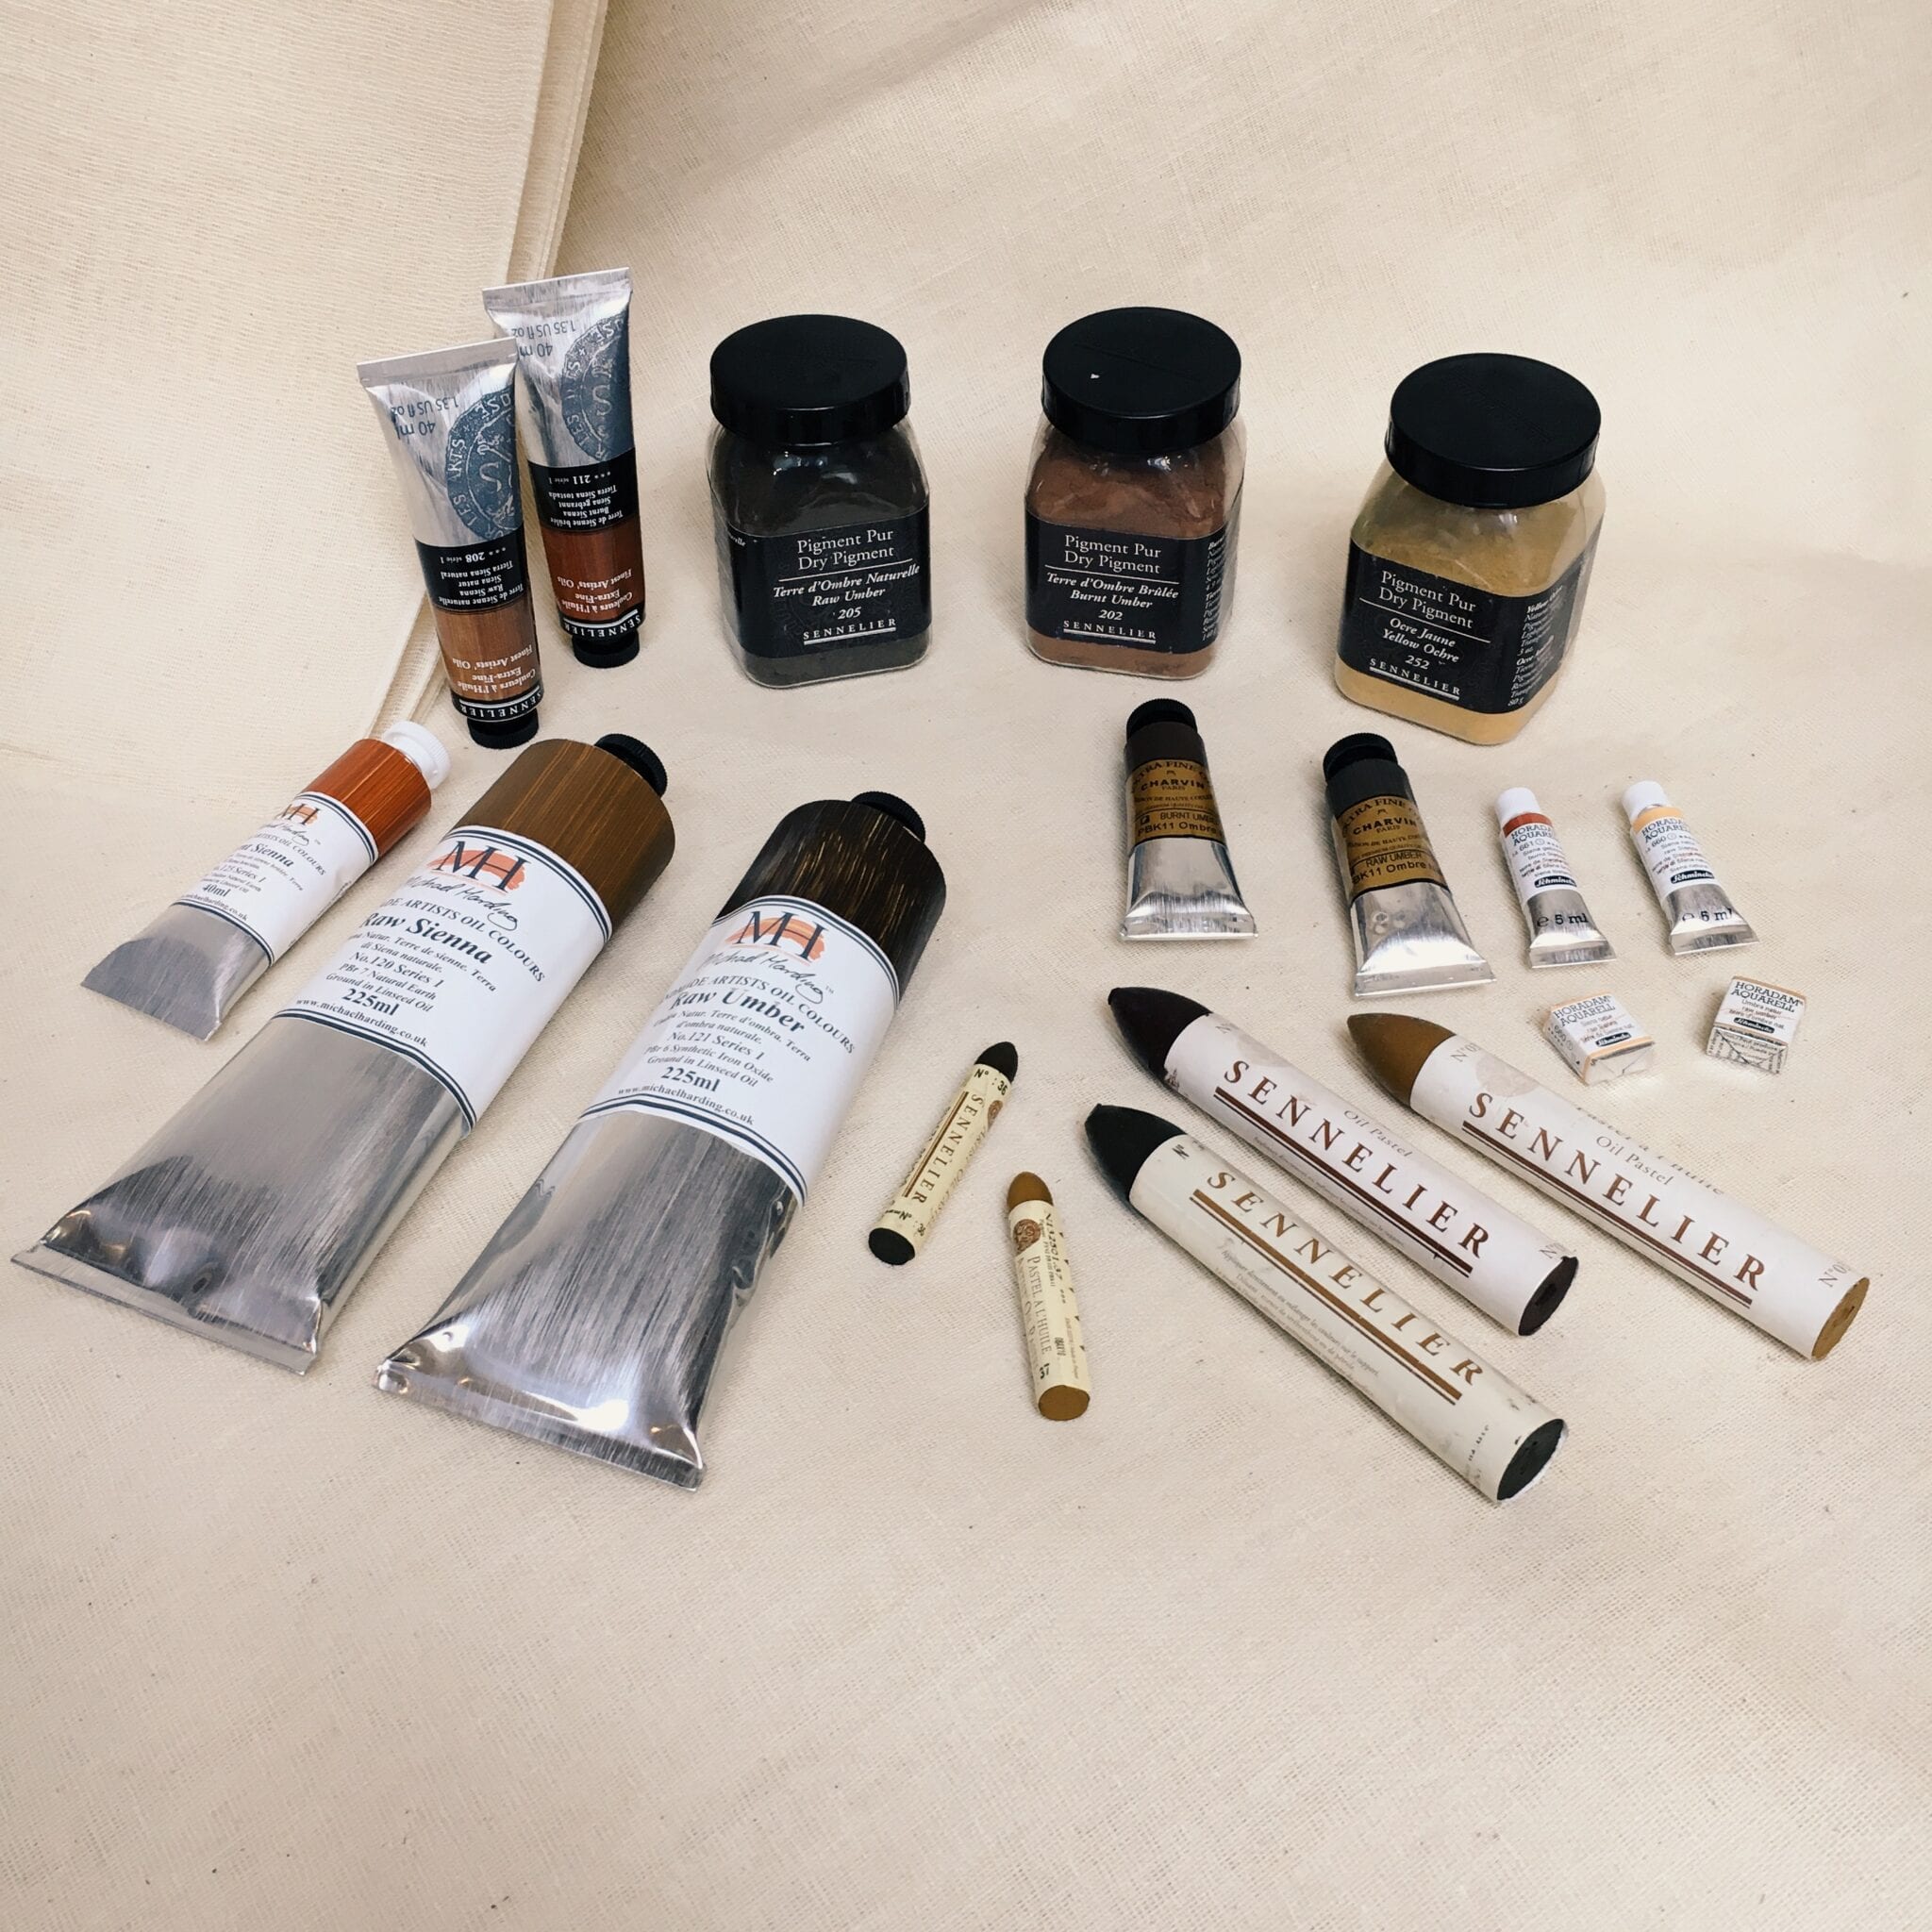
Another complaint about acrylic primer is that the colour of the ground is too bright a white. With oil painting ground, the colour is often subtle and slightly warm, with a hint of a buttery yellow tint – this is especially true for older painting grounds which were made with every artist’s greatest desire – lead white! (For more information on white pigments see my other blog post – https://greenandstone.com/blancety-blanc-the-truth-behind-white-paint/) One simple way of partially dealing with this is by either tinting your acrylic primer (if you are doing it yourself) with a pigment or paint, or simply washing a colour like burnt sienna over the top of the primer.

OIL PRIMER

Oil primers are meant for oil painting – and that is OIL PAINTING ONLY! Oil primer creates a slippery surface with no absorbency. Being slippery the paint can be moved around and manipulated very easily. Being non-absorbent, the paint does not sink into the primer, and instead shows off colour in all its glory. Indeed, on acrylic surfaces it can be hard to move around oil paint so much without creating a muddy surface, especially because once paint is applied to acrylic primer a stain usually remains, whereas with oil primer the paint can be wiped off almost completely without so much as a smudge. It is this non-absorbency that really sets oil primer apart – the paint truly looks delicious on it, and should look just the same in twenty years as when it was freshly applied. Yum! This is in contrast to painting oil on acrylic, which can appear to go flat even overnight. Of course, this does not apply to when using acrylic on acrylic. Indeed, I remember clearly an old lady oil painter who came into the shop and had only ever used acrylic primed cotton, I suggested she try oil primed linen, and yer know what, she came back and was hooked because the colour remained so true.

The other thing to note about oil primer is that we know what it will be like in 500 years. Most likely it will be in excellent condition, perhaps a little stiff, perhaps with a yellowed varnish, and some cracking to the surface, but ultimately in a very good state. We do not know what acrylic primer will be like because it only started to be used about sixty years ago. 

Bacon’s Screaming Pope on unprimed canvas

NO PRIMER?

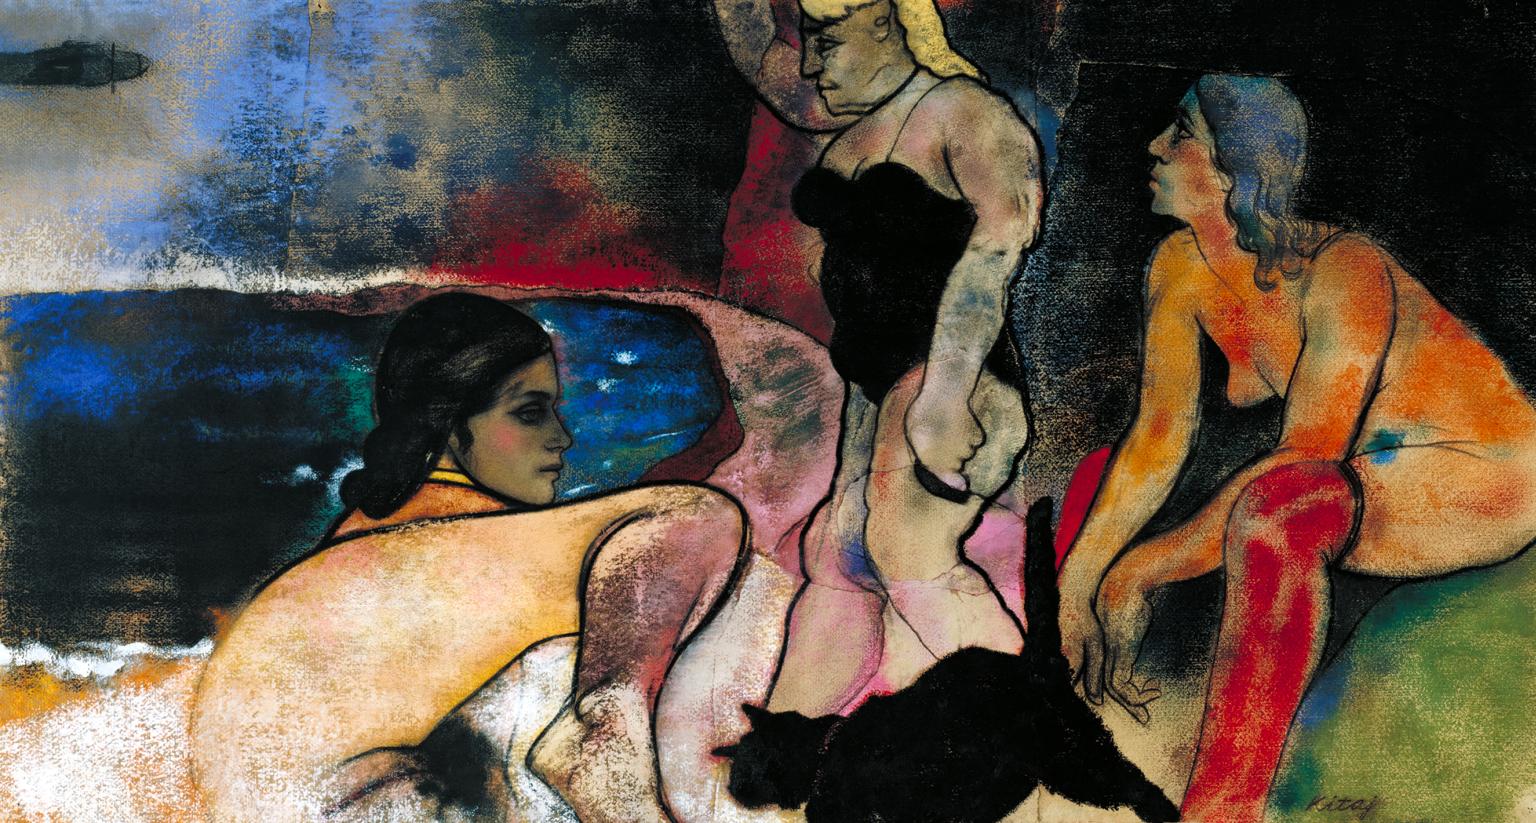
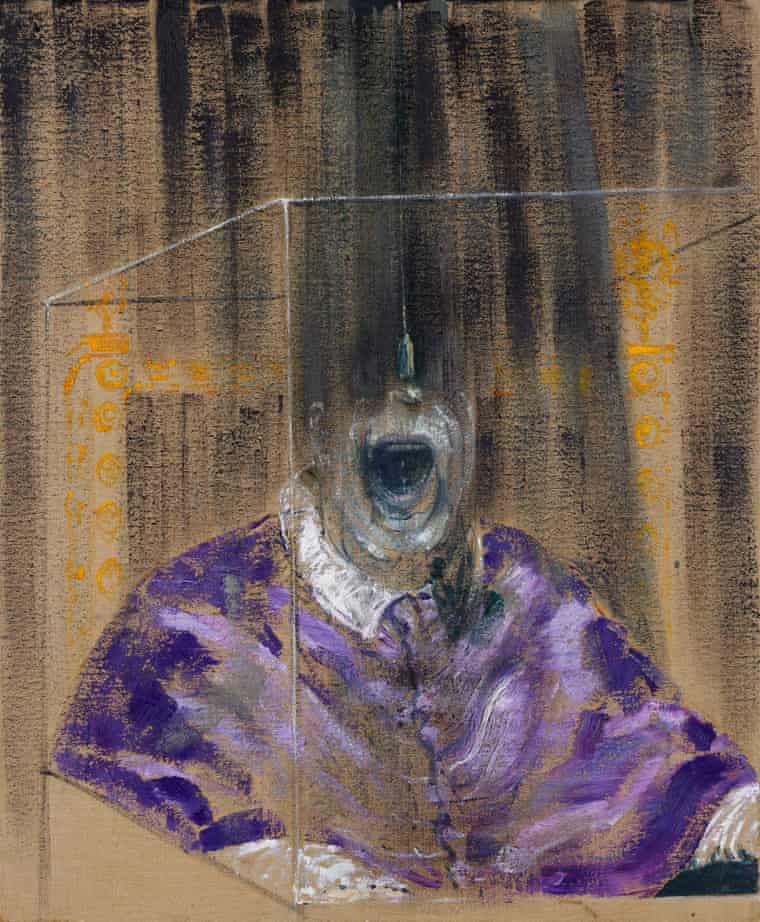
Earlier I provided the rather square general rule of thumb regarding primers and paints. Some artists of course, do not care for these rules. Helen Frankenthaler, for example, used unprimed cotton when she made her soak-stain oil and acrylic paintings. By using unprimed cotton Frankenthaler emphasised the flatness of the painting to her advantage. She created great fields of abstract colour which so far have stood the test of time! As she said, “There are no rules. Go against the rules or ignore the rules”. Technically, by using oil on unprimed canvas Frankenthaler has risked the longevity of her canvas because oil will eventually rot the canvas, but how long that will take is not clear. Another artist who almost always used unprimed canvas was Francis Bacon, an artist regularly referred to as the greatest of the 20th century. Bacon used the warps and roughness of unprimed linen to alter the distribution of oil paint and thereby help create the look of his often violent and deformed paintings. Being unprimed also increases the absorbency of the material, so the colour of paint appears flat, which in Bacon’s case often adds to the impending sense of doom and darkness so present in his work. As shown by both Frankenthaler and Bacon, it is OK, and often brilliant to use unprimed cotton and linen.

CONCLUSION

Before ending, and summarising this rather lengthy post, I think it is important to remember that cotton and linen and acrylic and oil primer are not the only options for surfaces to paint oil and acrylic on. There is also jute, cardboard, paper, wood, your wall, anything really. Picasso, Constable, Toulouse Lautrec, Basquiat, all painted on unusual and unorthodox surfaces – sure, they’ve caused real problems for conservators, but it just shows there are no limits to artistic expression. Ultimately, it is all a question of taste and budget!

By Ned Elliott

Posted on

An Examination of Earth Colours

Brown pigments might not be the most glamorous of the bunch, but have no doubt, even though they’re taken from the earth, they sure ain’t just dirt! 

The most common brown pigments used by painters in all mediums are the fabulous foursome of raw umber, raw sienna, burnt umber, and burnt sienna. These “earth colours” (as they are known) are extraordinarily useful for creating paintings full of subtle gradations from light to dark, whilst also allowing the painter to develop a natural sense of realism and authenticity, as well as richness and depth. The two raw colours have been used since prehistoric times, and all four have been used by artists’ ever since. For a bunch of colours you might associate with dreariness they are actually a surprisingly dynamic bunch with innumerable variations in hue, from yellows, to red, to greens, to blues. So without further ado, join me in looking at these four pigments, their histories, and their uses.

Raw sienna is a beautiful warm, ever so slightly creamy deep golden yellow, just a bit darker than yellow ochre, and just a little more opaque. As with the other three pigments it is stable in pretty much all binders – oil, watercolour, acrylic, etc. As the name suggests the original premium pigment was derived from Siena in Tuscany, and in this pigment there is a real sense of that place, with the colour being evocative of sun-baked landscapes blown through with dry winds. Nowadays the area around Siena has for the most part being exhausted of its supply of the pigment, though some is still to be found on the western slopes of Monte Amiata, Tuscany, where Daniel Smith gets his special selection for his Monte Amiata Natural Sienna (one of his seven sienna colours) and so does Michael Harding for his raw sienna oils. Until 1988 Winsor & Newton bought sienna pigments with a beautiful bright undertone from a mine south of Siena, after this they adopted transparent synthetic iron oxides which they consider to closely match the old standards. The pigment is still mined in Sicily and Sardinia as well as the Lehigh Gap in Pennsylvania. If you want to know if your paint is made of the real stuff, just look for the pigment number, and if genuine it will say PBr 7 (the same for burnt sienna, raw umber, and burnt umber because they are all made of pretty much the same components – iron oxide, manganese oxide – just in different quantities and additional mineral variations. 

Raw sienna is especially useful as a ground tone and for underpainting. It is also excellent for creating skin tones and delicate yellow creams. Another good thing about raw sienna, especially in watercolour, is that when mixed with blue it doesn’t immediately turn into a blue, so when painting landscapes or a blue sky it is useful for glazing over the blue to create the effect of the warm light of the sun. The pigment was prized during the Renaissance because it’s so useful for portraiture, and that’s why around that time burnt sienna was developed.

Burnt sienna is the roasted or calcinated form of the raw pigment. This process dehydrates the present iron oxide and changes it to a warm fairly bright reddish-brown colour. Like raw sienna it is a very transparent paint with an excellent colour and is completely permanent and lightfast, and was used aplenty during the Renaissance. It is said that sienna from Italy has a slightly bluish shade whereas that from America is more yellow. Burnt sienna is a great colour for mixing, and might be the most dynamic of all the earth colours for it. Not only is it excellent for flesh tones, but when mixed with yellow it returns to a raw sienna or yellow ochre hue, mixed with blues like ultramarine or phthalo blue it turns into all sorts of pleasing greys, blues and browns, mixed with greens you can get all sorts of forest colours, and mixed with reds you enhance the colours to a rugged, strong earthy richness. Thinned down it works wonderfully as a warming glaze. Anything you add it to will be richer and more atmospheric for it. I use it as my ground tone in oil painting because I think it has a unique combination of warm brightness and depth of colour.

In contrast to the siennas there are the umbers which are darker browns. The name ‘umber’ is thought to have two possible points of origin. First is that the name comes from the Latin “ombra” for shadow because the pigment is very useful for rendering shadows. The other explanation is that the original pigment was derived from Umbria in Italy. I think the shadow idea is more likely! Umber occurs in a limited number of geographical regions where its colour can range from a dark brown, a more greenish brown, and even a slightly violet brown. The best umber, which has an especially dark, rich, and slightly olive-green shade, comes from Cyprus at Margi, just west of Nicosia. There is umber in England, but people complain it’s too gritty.

Tonally, raw umber is cool and dark whereas burnt umber, which like burnt sienna is just the raw pigment roasted, is a darker, redder colour, without the coolness or the green hint of the raw equivalent. As one 17th century man said raw umber changes from ‘being A fowle and gressie Coullerr, [THAT’S HIS OPINION NOT MINE] iff when you haue bought itt you burne itt in A Crusible or Goldsmiths pott, itt is Clensed [it really is a transformation!]’. Umber is a key element of chiaroscuro painting, and was central to Caravaggio’s palette, as well as Rembrandt’s, who used it to make all of his sumptuous and complex browns. One thing to remember about umber (in oils) is that it dries especially fast and so it is very useful as a ground to work quickly on whilst it also speeds the drying of other pigments it is mixed with. Vermeer was also a big fan because it was excellent for creating shadows in his quiet interior paintings, whilst it was completely widespread in Dutch landscape painting of the same period. Umber is a useful alternative to black, the addition of it in a mix or a painting is much less harsh. 

Like burnt sienna, raw umber and burnt umber are absolutely top notch for creating a tonal ground and blocking in when painting, especially in oil. Using a raw umber ground, perhaps with a touch of white will create an overall effect in your painting of a cooler tone and it works really well if you like a painting with subtle, muted tones. In contrast, painting a ground of burnt umber will add a strong warm undertone. This is really one of the strengths of these colours, you can use them to create helpful tonal sketches before embarking on a full scale painting. A classic combination is burnt sienna and burnt umber, with the sienna in varying thicknesses of application marking out light and mid-tone patches, and the umber cooling and marking out the darker areas. Using these colours for an undertone will really make your painting shine, glow, and be generally more moody and swish! If you have only ever painted on a white surface (as all canvases are) remember that in the past to do so really was considered unusual, give an undertone a go! And if you’re somehow worried by browns remember Rembrandt was a big fan of all four of these colours, and used them almost continually. Looking at his paintings you will note, they really are very brown, but he has used them, being the genius he was, in such a way that he has brought the brown alive! You can do it too! Also, one last thing to note, from personal experience, I just love the creamy and kinda stoney sludginess that you get from mixing umber with a bit of white, it’s kind of aged and classy…

Now, of course, some great painters have not been a fan of browns, and yer know what, there is some reason. The Impressionists, for example, were not keen and said the earth colours were old and dull and would not be allowed on their palette. Instead, they would mix their own browns if need be. I think this criticism is reasonably valid, because when used badly or obsessively (I’m not going to point any fingers) they can seem stale.

Before we end, remember with all these pigments in all the different mediums the quality and colour varies from manufacturer to manufacturer, some are more grainy, some are smoother, some are more red, some are more brown, or yellow, or green, you just have to find out which suits you. As with all these pigments, if you are after the genuine (and best) earthy stuff look for “PBr 7” somewhere on the tube, that means it’s the real deal.

One word I’ve used again and again in this post is “rich”, and that’s because quite simply, by using these colours your paintings will be richer! These colours are indispensable! Use them!

If you would like to see some other blogs about pigments or colours see:

WHITE https://greenandstone.com/blancety-blanc-the-truth-behind-white-paint/

BLACK https://greenandstone.com/black-velvet-a-look-at-black-pigments/

ANOTHER BROWN https://greenandstone.com/the-secrets-of-sepia/

By Ned Elliott

Posted on

Concerning Confit Pots

As anyone who has visited Green and Stone will know, the shop is filled to the rafters with art materials jostling for the attention of the artist in search of inspiration, and there is, of course, always something to be found. But not only is the shop like an enormous larder for artists needing to stock themselves up for several filling meals, it is also one of London’s premier curiosity shops, for within these walls there are laid out, with a keen curatorial eye, a delicious medley of antiques, ranging from primeval fossilised ammonites to comparatively contemporary late-nineteenth century French glassware and exquisite handmade English watercolour boxes, crafted by bewilderingly keen eyes. But my favourites, out of all these pieces of history are the confit pots, collected from markets in France. With their broad, shapely form and tough structure they are imposing pieces of pottery, with a profound utilitarian aura, but this does not detriment from their beauty, because it is their very toughness and lack of uptight delicacy in the application of the almost pungent mustard yellow glaze that makes them so full of character, exuding a rustic charm redolent of French provincial cooking and living, the sort expounded by Elizabeth David and so feverishly loved by Keith Floyd.

Confit is the French word that means “to preserve” and it is these mustard and sap green pots which were used for storing succulent cooked meats like confit d’oie (preserved goose) and confit de canard (preserved duck) which could later be made into cassoulet, for example. These pots were then buried in the cool ground or stored in larders. This storage process preserved the cooked meat without refrigeration and could then be enjoyed throughout the winter. The bottom halves were left unglazed for burying in the ground since the glaze would just fall off when buried in the ground. The glaze line marks the depth at which the pot was buried. Indeed, it is this half-glazed look which differentiates them most from other pots. Occasionally, you will see confit pots in a creamy off white, these pots were not buried and were covered in a full glaze and like many things once considered only worthy of the poor they are now considered incredibly swish. In those days modern refrigeration had not been invented, so confit pots were made in enormous numbers, indeed, they were the go-to nineteenth century preservation device, like Tupperware, or a Kilner jar. Nowadays, whilst the production methods of confit meats has hardly changed, the vessel in which confit is stored has, and so confit pots have lost their useful purpose, to tins and jars.

Like I said, the original purpose of these pots is now gone, and they are now only items of beauty and historical interest. But who first took interest in them, aesthetically speaking? Well, number one, would have to be Vincent van Gogh, who nearly always partnered his sunflowers with a mustardy pot, creating a wild exposition of yellow. In this sense, maybe van Gogh’s very own yellow confit pot is the most unwittingly famous pot in the world, seen by millions (billions?), caught in paint for all time. If you look carefully through van Gogh’s paintings you will see the pots appearing again and again, for example Still Life with a Plate of Onions features a sly green confit pot with a spout peeping out behind a table. Van Gogh painted his sunflowers in Arles, in the south of France, and it is the south-west region of Perigord nearby where confit is the noted speciality. Generally speaking, the green glazed pots come from north of the Loire, and yellow from south of the Loire. I think in some way the association with van Gogh is why the appeal of the pots is so strong, and also why unlike other pottery a chip is not considered detrimental, but rather characterful and beneficial to the object’s ability to tell a story. So, if you feel like your still life is lacking a certain je ne sais quoi, perhaps, a confit pot is the answer. 

Confit pots come in all shapes and sizes, almost always with ring handles, but sometimes with spouts, and large arching handles.The smaller, more petite pots are rarer, more coveted, and more expensive, and the green glaze is less common than the powerful mustard glaze. As aesthetic objects the pots are superbly flexible, as an interior designer might say, “the potential is limitless”. You can use them to display flowers, paintbrushes, old bullrushes, or without, and simply on a shelf, perhaps next to a littler or bigger pot, making a pottery family. In some ways, there is nothing more tasteful! In seriousness, they truly are beautiful, and despite being created in vast quantities each one is unique and it is always a treat to see one. There are actually also bowls and pouring vessels with similar glazes, and they are equally beautiful and with similar histories. So, whether you buy one for yourself or for a friend, there is simply no better way of inserting a little piece of rural France into your home. 

By Ned Elliott

Posted on

Sussing Out Solvents


For oil painters solvents are essential to the painting process. Without solvents oil paints couldn’t be thinned, mediums and varnishes couldn’t be made or used, and brushes couldn’t be cleaned. Fortunately, that is not a situation we have to consider because we have plenty of solvents, but with so much choice it can be difficult to know what the difference is between them all, and that’s just why I’ve written this piece!

Turpentine is easily recognised by its strong and aromatic smell, heady with pine. It is an art material with an especially long and strange history which is very much worth mentioning. It has been in production since antiquity, but only began to be used in painting in the fifteenth century. Before then, in ancient times, turpentine was distilled locally in a primitive manner by boiling the fresh resin from pine trees in a vessel covered with a sheepskin laid over it fleece side down. When boiled the volatile liquid would evaporate, condense, and accumulate in the fleece. Afterwards the condensed liquid was squeezed out and kept in an amphora, or something antiquated like that, perhaps a lekythos (yes, I like history!). A more refined process using a still was devised in the 3rd century by physicians in Alexandria. However, these early alchemists did not use the product in the way we do today, rather they used it as medicine. Today’s doctors would most definitely advise against ingesting it all, but for thousands of years, that’s practically all people did. The Romans drank it to treat depression, during the 16th century naval surgeons injected it hot into wounds, and in the 19th century it was a popular choice as a tonic to kill internal worms. In 1821, one doctor ordered a patient afflicted with tapeworms to drink turpentine every few hours! At the same time in the USA (the age of snake oil salesmen), a certain “Wizard Oil” was being sold, claiming to cure “neuralgia, toothache, headache, diphtheria, sore throat, lame back, sprains, bruises, corns, cramps, colic, diarrhoea, and all pain and inflammation”, it was, of course, just turpentine, and you know what? It probably worked! By killing you! 

Undoubtedly, whilst ingesting turpentine certainly does have strong purgative qualities capable of emptying one’s entire gut (not really a good thing anyway), its toxicity, and ability to cause everything from kidney damage to bleeding in the lungs wholly outweighs any short term potential benefit. So please DO NOT INGEST TURPENTINE.

Anyway, that’s the curious history of turpentine very briefly covered, I’m sure there are many more horrors to be discovered. Thankfully, the idea of using turpentine for painting really took off and that is what we are going to explore next. 

Turpentine is the classic artists’ solvent, and being very old it has many names including distilled turpentine, spirit of turpentine, and oil of turpentine, but they are all the same thing, a highly refined essential oil distilled from pine resin. As a solvent, turpentine is oily and ever so slightly viscous. Turpentine evaporates from paint mixtures at an even rate, reducing the chances of colours sinking unevenly when thinned down whilst having more viscosity and a more even drying time means turpentine gives you more colour control when painting. Importantly, turpentine has a very strong solvent action and is the first stop for dissolving various resins and is the key ingredient to all sorts of mediums and varnishes. 

The downsides of turpentine are that it is inflammable and emits vapours which can be irritable to the skin, the eyes, and the lungs of a lot of people, though often these problems can be mitigated by a well-ventilated studio and the use of barrier cream on your hands, and big scuba goggles for your eyes (maybe a bit far…hahaha! Too funny!). The other downside is the cost which is rather more than that of white spirit. It is important to note that whilst there is no difference between say, spirit of turpentine and oil of turpentine, there is a difference between artists’ turpentine and household turpentine which is often less refined and can still contain gummy residue which can stop your painting from fully drying or cause yellowing over time. Artists’ turpentine has been rectified, or even better, double rectified which means the gummy residue in pure gum turpentine has been fully removed. Of course, many painters do use household turpentine for their painting, and this is usually fine as long it is kept in a sealed container and kept away from the light (which can trigger gumminess). The cost of turpentine means that it should be reserved for painting use only. It would be a real waste to use it to clean brushes.

In contrast to turpentine there is white spirit, a petroleum-based solvent distilled from coal. It is more watery than turpentine, but also has a drier presence which means it evaporates more rapidly and unevenly which can lead to colours looking uneven and flat whilst it also doesn’t give you much time to play around with your paints. White spirit can be stabilised as a paint thinner by mixing in a small amount of linseed stand oil. By doing this you help the solvent settle out and evaporate more evenly whilst painting. The good thing about white spirit is that it is much cheaper than turpentine and whilst it can be used for painting, it is best reserved for sketches and practices, and is really just ideal for cleaning brushes and palettes. Importantly, white spirit is not a strong enough solvent to be used in the making of mediums and varnishes. But usefully white spirit, unlike turpentine can be stored for a long, long time without deteriorating. There are pros and cons to everything!

As well as turpentine and white spirit, there is Zest-it, a citrus-based equivalent, which is non-flammable, non-aromatic, and is classified as biodegradable. Zest-it is similar to turpentine because it dilutes natural resins, including dammar, and so can be used to make excellent mediums and varnishes on a par with those made of turpentine, it is therefore an ideal alternative if you find turpentine is affecting your health. Zest-it is also especially good for painting when on holiday, because being non-flammable, it can travel by road, sea, and air. To dispose of the sludge-like remainder after painting the makers suggest putting it into damp sand or soil, where it will gradually biodegrade (you could not do this with the other options). Importantly, whilst Zest-it is non-aromatic and does not affect one’s health its zesty and zippy Valencian orange perfume is rather powerful.

For artists wishing to avoid the strong odours of white spirit, turpentine, or Zest-it, Sansodor, is a low odour solvent for oil painting. Like white spirit, it is petroleum-based, but is of a higher quality as it keeps the paint ‘open’, if anything, for slightly longer than turpentine, about 6-8 hours (meaning a nice, even finish). By low odour, I really mean low odour, you can only smell if you really go close to the bottle (inadvisable).

Another odourless solvent is Gamsol which is an absolutely top quality solvent. Gamsol evaporates evenly and completely without leaving behind any residue like turpentine can (sometimes) and it beautifully thins colours as well as mediums made by the wider Gamblin brand. Gamsol is also safer than turpentine as it does not emit so many vapours. The downside of Gamsol is that it is very expensive, more so than turpentine, so needs to be used very sparingly. 

One final solvent to note is Winsor & Newton Brush Cleaner which is unusual in that it is water-miscible and is excellent at removing dried oil, alkyd and acrylic from brushes.

I hope this has cleared things up for you. For me, there’s nothing more evocative of the artists’ studio than the heavy scent of turpentine. It is undoubtedly an absolute classic, but because I don’t actually paint that much, and I don’t have a studio, its Sansodor for me!

SAFETY NOTE : DO NOT INGEST ANY OF THESE SOLVENTS AND ESPECIALLY DO NOT INJECT HOT TURPENTINE INTO YOUR WOUNDS 

By Ned Elliott

Posted on

Twiddlin’ Thumbs, Bloody Fingers – A Look at Lino

I think it’s fair to say an unprecedented number of people in this country are twiddlin’ their thumbs at an unnatural frequency and speed, and as we know, the devil makes work of idle hands, and twiddlin’ is idlin’, don’t forget! So, as an unqualified exorcist I am going to help you, yes you, smite the devil and kick him out of your life at this strange, strange time!

Before you do anything else, you first have to stop twiddlin’ your thumbs, they will only get tired if you keep doing it, and for what I’ve been doing, and what you might choose to do, one has got to have fresh and frisky thumbs, not tired and achy ones! This is because lino printing, yes, lino printing, is somewhat dangerous and can often lead to injuries of the hand if one is not paying proper attention or one has fatigued phalanges! Do you HEAR me?! TAKE CARE!

Lino printing, like pastels and collage, is one of the many techniques I was taught at school but ended up hating without much reason. These last few months I have been revisiting these personally relegated art forms in the hope of taking a positive new view. It has worked with pastels, I haven’t yet tried collage, and, yer know what, it’s worked for lino printing!

Lino printing, or linocut,  began when some old fella back in 18-whatever didn’t have anything to do and got caught looking at a puddle of linseed oil.  He must’ve been really bored because when he was looking at it he keenly observed that when linseed oil oxidises it produces a strong dry film. This led the fella to venture forth and develop a process whereby he purposefully heated puddles of linseed oil into thin layers of rubbery film which he then, being an absolutely merciless capitalist looking to destroy the woodblock printing industry, pressed onto pieces of rough jute which helped hold together these wonder sheets. This fella, knowing how much artists lick their lips at a cheap, cheap bargain presented his handy new product to folks straining under the price of blocks of apple wood, and in one fell stroke not only did he do over the tradition of ukiyo-e woodblook printing, he also changed kitchen floors forever. Just kidding about ukiyo-e, but no doubt, this is a fine example of creative destruction within a capitalist system.

Lino printing is a form of relief printing which means the artist (you) cuts in to the plate (the lino) where you don’t want the ink to go. This can be confusing because you are working in opposites, but you get used to it quite quickly. Making a lino print is quite easy, all you need is a gung ho go get em’ attitude (not really), a piece of lino, some lino cutting tools, printing ink, and an ink roller. With all these things in your possession, and an image in mind, you can cut into the lino (where you don’t want the ink to go).

There are two main types of lino to choose from, the original OG which looks like an unappealing grey slab of hard rubber, and the second which is the newer, softer, creamy gold kind. From working in the shop it is clear most people go for the softer version, but don’t write the original off, it has its advantages. The original is certainly tough, and you do need strength to use it, but with a little bit of a warm up on a radiator or a sit in the sun (depending on time of year) the slab will slightly soften. This type of lino allows for finer detailing, crisp edges, and more texturing. As it is so tough you are less likely to slide into another patch of lino you didn’t want to cut out. However, there is one key detraction which is that you are more likely to slide off the lino and into your hand. I have only ever hurt myself using this tough lino, but that doesn’t mean I haven’t used it since! I’m a risk taker! It’s better to burn out than fade away, baby! 

The softer lino is much easier to use, especially for children who might struggle with cutting into the grey kind. This lino lends itself well to smooth curved lines, and you can easily glide through it. However, it is very easy to accidentally glide too far and cut into a bit you didn’t want to take out. But then again, you are less llikely to take out a bit of your finger.

To cut into your lino you need a cutting tool. This is normally a plastic or wooden handle which will hold a variety of different blades. Differently shaped linocut blades produce different types of cut in the lino – broad, thin, deep, shallow, pointed, rounded. A basic set will have about four different sizes, and will definitely have you covered, but there are many more if you feel like carrying on. 

The great thing about lino printing is that whilst you’ve only cut out one image you can make hundreds, and rather than all being the same, it is surprising how different each print can be. With each new colour used the image changes, and so it does too when you over ink or under ink the lino. The paper you choose to print on is also important, when it is smooth you’ll get a truer, more even print, whilst a textured paper offers an unreliable but perhaps, more charming result.  I have recently been printing on a variety of different papers, including pastel papers, khadi papers, and Japanese papers. I have especially enjoyed printing on Japanese papers like Atsu Kuchi and Tosa Washi which have a wonderful warmth, softness, and delicacy. And as anyone who knows me knows, I am a delicate fellow. The paper I love using the most is a Nepalese paper (the name of which I can’t presently remember) which is pearly and translucent, and when printed on creates a rather ghostly image. 

A note on printing methods: 

Some people like printing whilst standing up or when sitting on a chair and using their hands to apply pressure. I think they are wrong! I suggest getting a hard piece of board, putting it on the floor, putting your paper down, then your inked lino, then sitting on top of it, and wiggling around. There is nothing better for applying even pressure to your precisely carved lino and artisanally crafted piece of Himalayan lokta bark paper than your own body weight engaged through a firm gluteus maximus (bum).

I hope you have found this to be both mildly informative and humorous. Just so you know, the inks I’ve been using are Schminke water-soluble relief inks which come in range of strong colours. Anyway, that’s me for today, I hope this has tickled your fancy, and that maybe you’ll put your twiddlin’ thumbs to use. If you do decide to take up lino, just remember, you cut away what you don’t want to appear, you gotta look out for yer fingers, and it will all come out as a reverse image, so if you’re including writing, don’t be an idiot like me, and make sure that you reverse the letters beforehand!

By Ned Elliott

Posted on

Have you tried pastels, perchance?

Are you allergic to water? Do you hate the sight of linseed oil? Or are you just fed up?!

If you answered “Yes!”, why not try pastel painting? 

You really, really just need to get your thumb, get your forefinger, and clench them around a little lump of colour, wiggle your hand over a piece of delicately textured paper, and let it all out! Wiggle free! Wiggle free, I tell ya! 

*

Some of the most enigmatic paintings of our time have been made with this medium. Soft pastels have a unique suitability to the capturing of the dreams and nightmares of Morpheus’ land where intangible objects, alternate visages and crumbling immateriality bug you into the waking day. R.B. Kitaj and Paula Rego saw this potential! Do you? In the less verbose world, pastels are a robust and unfussy alternative medium to watercolour… 

Generally speaking, I don’t touch pastels, in fact, until recently I held the view that I hated them, but that was when I was young and prone to having ill-conceived views. What do they say? “You’ll understand when you’re older”, that’s what! Well, I’m two weeks older today! I used to be just twenty-four, now I’m twenty-four and a bit more, and so I understand! This change in my artistic sensibility followed a trip to the Oxfordshire countryside where I decided, quite radically, not to take my watercolours, and instead take my great aunt’s old pastels, with all the colours neatly cordoned off by card inside a delectably vintage Fortnum and Masons truffle box. She was a lady of good taste.

The results were astonishing, not just my obviously marvelous painting, but the revelation that pastels were really something! In all seriousness, looking at my picture you couldn’t tell, but looking at the work of R.B. Kitaj and Paula Rego you can see the power of the medium. In Kitaj’s ‘The Rise of Fascism’ solid areas of immensely deep prussian blue dissipate into cloud-like areas of lightness culminating in an altogether bewildering collection of textures and colour. In Paula Rego’s work, her heavy pastel work creates a corporeal image of skin perhaps more fleshy than that of Freud. Indeed, Rego, who turned to pastels in 1994 remarked that using them was “like painting with your fingers” and that “the changing it, the pushing it around, shoving it, makes it come alive”. This tactile quality is one of soft pastels greatest draws. These two artists perfectly illustrate the versatility of the medium and its textural dynamism, the varied effect of thick and thin, the difference between being scraped onto the page, to being softly blended in, the mystery of the layered colour.

Different brands of pastel offer different qualities. Sennelier Extra Soft ‘l’ecu’ pastels are like painting with dry butter (if you can imagine such a thing – I need to think of a better metaphor) and the quality of the pigment is unsurpassed. I can safely say, when you look at a turquoise Sennelier pastel you really do have to reevaluate your own sartorial style. It’s like it says to you, “ditch the black, honey”. Anyway, Unison pastels are a little more robust and of similar excellent quality, and they are all handmade in Northumberland. Imagine that! A little place somewhere sweet, where people, all day long, roll little sausages of colour, and get paid for it too, could there be anything better! In contrast, to these two softer pastels, conte crayons offer a hard-edged alternative capable of both sharp lines and smudginess. And indeed, there ain’t nothin’ that says “master draughtsman” quite like a sanguine conte crayon! Safe to say, we have all these pastels in our shop, and the cheap and cheerful ones too!

But what really is a soft pastel? “You ain’t said!” I hear you cry. Well, it is a dry pigment combined with an extremely weak binding agent, nowadays either methylcellulose (a converted starch glue) or gum tragacanth diluted in water, although in the past stale beer, milk, and oatmeal water were used. When all mixed together, the paste is rolled into thick or thin sticks, and then left to air-dry for a few days. Depending on the amount of binder used and the nature of the pigment, the pastel will be harder or softer. You can in fact make your own pastels. Recipes can easily be found online. It is in this simple process that a key advantage of working with pastels can be found. Being essentially pure pigment bound in the slightest amount of binder, the paintings do not suffer those effects of age which are caused by the changes the mediums of other methods undergo. This means that when using pastels and pastel paper of the highest quality, you are creating one of the most permanent forms of painting. This is why pastel portraits from the 18th century look as fresh as the day they were painted. 

I will end this blog by saying, you need no water, you need no oil, you only need a smudgy finger.

By Ned Elliott

Posted on

In Praise of the Watercolour Tin

Having recently returned from a few months travelling around such colourful places as Trinidad and Tobago and Guatemala it is quite obvious my trip would not have been as fun if I was without my trusty little watercolour box. With twelve colours set in a black enamelled tin, as a portable means of artistic expression it is unparalleled in its ease of use and sheer potential. Partnered with a pad of paper and a trio of brushes there is little in your way except the need to show some willing.

On holiday no one wants to look like a fool, with a watercolour box it is impossible to look like one. The reason being, if you end up making a bad painting you can quickly scrunch up your painting and slide your humble tin into your pocket, and so when some fellow comes strolling over the hill to have a look, you can simply say you were admiring the view, and that they should now go away, and leave you to your wandering thoughts. This escape would not be possible if you were burdened with an oily canvas, indeed the shame would be unavoidable and the harsh words of the strolling man upon seeing your work – “Good God, that’s awful” –  would positively ruin your holiday whilst also being forever fiercely etched in your mind. Even worse, if it was a small canvas the man would still know something was up, since you’d reek of turpentine. Therefore, not only does the preference of aquarella save space, it saves your ego too. This is particularly important if your reason for going away was to get some clarity on where you are in life. This is the fundamental reason why I took with me my trusty little tin. 

Away from the psychology of the matter, and more towards the actual thing. As I’ve noted, little space needs to be taken when travelling with watercolours. Even better, when travelling by air, and when your watercolours are in small enough quantities you can take the paints in your hand luggage, unlike explosive oils! Typically, even though I knew this, I still worried about it. Even better, being water based there is none of the bore from cleaning, or the guilt from dumping solvents in a pristine land. Most importantly however, the small tin is brimming with colour eager to burst forth onto some virgin page. Any watercolours can be used for this, but best of all are Daniel Smith. They are honest, true colours that go wonderfully far. These are what I was most fortunate to use. 

Watercolours very lightness of being translates into a lightness of touch, with their translucence and luminosity being very effective at quickly capturing changing light effects or general moods. To explain what I mean, the following is an extract from my upcoming best seller ‘Painting in the Exotic’, coming out in 2020!

“The sky was briefly streaked with milky magenta and pale blue, banana leaves and palms lost their zest and colour and transformed into abstract silhouettes against the greying sky. I stared at a bare lightbulb strung up under the timber floor of the house above. It was so bright and round, but not so white that it could be mistaken for the doorway to Heaven. Nonetheless its luminous nakedity was entrancing and strange. Insects danced around and I blankly stared, not with melancholy, but contented and full nothingness typical of someone has just smoked a doobie, not that I smoke.”

This is just the sort of poignant, emotive, cripplingly moving scene that a quick watercolour would suit. O boy! It would sell for thousands! 

As ever I haven’t really explained myself very well, but the point is, the watercolour tin is a classic! There is a reason the likes of Turner and Constable were so devoted to them. Like a great belt, a watercolour tin will stay with you all your life, not as an object, but as an intimate friend. Ooo er! Like having a dog who takes you to new places a watercolour box encourages you to venture around and absorb new surroundings, whilst it’s very simplicity makes it suitable to share with other curious folks. Equally, having mine, I was encouraged to sit down without need of an excuse. Best of all, if you decide you don’t want to use the tin, just slip it away in your bag. You cain’t do that with an easel!

So, that’s that, in the deep dark winter, be brave and get out, or wait eagerly for the summer ahead when you can rest a pad of paper on a rock or on your lap, pull out your tin and while away the day. There is almost no greater pleasure!

By Ned Elliott

Posted on

Oil! What does it matter?

Am I just a tiny speck of pigment on the end of a cosmic paintbrush? 

Why am I really doing this, thirty years on? 

How did I end up involved in conceptual abstraction when all I truly want to do is paint dog portraits?  

How do I capture with a pencil the sense every night of staring into the deep dark void? 

Am I still desperately trying to please Mother? 

*

These questions bother all artists, young and old, but there is another, one less existential, and more practical –  is it at all significant which oil I use when painting? If you are a watercolourist, no, if you are an oil painter, yes!  Ho ho!

The oils we will talk of are vegetable oils which have the desirable property of drying to form a tough adhesive film whilst suspending pigments in a stable solution. Once dry the process is irreversible and the oil cannot be reversed to its original state by any means. These oils, namely linseed, poppy, and walnut, allow the painter to paint.

Crude oil makes the world go round, linseed oil lets the people paint its spin.Linseed oil is pressed the from the seeds of the flax plant which has delicate lilac flowers and which is also used to make linen. So, this excellent plant singlehandedly provides the backbone to an oil painter’s life. God bless you little flowering thing, how lucky we are to have you on this here Earth!  For good reason linseed oil is everyone’s starter oil, it is not only glossy and reasonably fast drying, it is trustworthy, tough, and flexible. 

Nowadays linseed oil is produced on a huge scale as part of a highly developed modern industry. The oil is normally extracted by crushing the seed and pressing it with the aid of steam. It is used in everything from food, health supplements, furniture care, and of course, artists’ materials. Unlike poppy and walnut oil, linseed oil comes in a plethora of forms, whether in the form of refined, cold-pressed, sun-dried, or stand oil.  

The first form of linseed oil to mention is the standard refined linseed oil which is made by crushing and pressing flax seed with the aid of steam. This industrial method helpfully reduces the cost of production. It is an excellent all round glossy oil good for making your own paints, painting with, and making glazes. However, it is not without criticism, some, notably Ralph Mayer, the highly reputable and marvellous investigator of all things painterly wrote that whilst economical, refined oil, or hot-pressed, is inferior to cold-pressed oil, because the steam is so efficient that it extracts other, less desirous, substances that cannot be removed by however much refining. According to Mayer, linseed oil’s heyday was the good old 19th century when all was good, nothing was bad (…?), and canvases had not been dessicrated by steamed paint. Mayer also wrote that refined oil was more prone to brittleness than cold-pressed. With the greatest respect to Ralph Mayer times have changed since his book was published in 1940. Modern technology and alkali refining techniques have redressed the balance of the quality issue, meaning it is highly likely that the difference between hot and cold-pressed is negligible.

Importantly, whilst refined linseed oil looks pale, it has been bleached, so as with most other linseed oils it will, over the years, revert to its yellow state. When old, linseed oil gives a warm glow to a painting. This patina, depending on the individual is either positive or negative. Personally, I think it is rather nice, and think it is the answer to my rather simple judgement that old paintings are better than new ones. This factor of yellowing is therefore very important to the oil painter! It is advisable that when using whites, pale colours or light blues consider alternatives to linseed oil.

Refined linseed oil has two more mature cousins, linseed stand oil, and sun-thickened linseed oil. Stand oil is linseed oil heated to 273-300 celsius for several hours with nothing being added or taken away. This heavy, viscous oil looks like a pale honey and is often found in stumpy metal tins whose purpose I cannot claim to know. This oil requires a little more effort from the painter in that to use it one must thin it with turpentine. When cut with turps it is unlike other linseed oils as it is practically non-yellowing. It is ideal for painting smooth, enamel-like films free from brush marks and full of vibrance and life. However, It is only to be used for painting and glazes,  not paint grinding.

Similar to stand oil is sun-thickened linseed oil. This oil is also thick and honey-like, however it is not readily sold though making it is relatively easy and inexpensive. This form of oil, like stand oil, is ideal for forming light, almost invisible glazes of colour,  delicate, soft shadows or wonderful areas of luminosity. Indeed, if you sadly find yourself in the scenario where you have a rather dull patch on a painting the effect of sun-thickened oil or stand oil mixed with a transparent colour can be astounding. To make your own sun-thickened linseed oil pour some refined linseed oil into a glass container, place a glass lid over the top supported by a few match sticks so air can get in and out, put the container on a window-sill or work bench, give the oil a little stir from time to time, say every other day, and when you have a consistency similar to a thick honey you can use it as you like. As they say, homemade is best! So, if you are one for delicate, luminescent glazes and smooth films, use either of these versions of linseed oil.

As mentioned linseed oil is not the only oil to paint with. Indeed, If you are a forger of 15th century paintings linseed oil is definitely not for you as it did not find popularity until later in the millenium. Instead, the oil of the delicate and creamy walnut is more recommendable, though I do not encourage artistic fraudulence, or do I…? (***ThE aRt MaRKeT iS a cOn!***) The red-turbaned, palid-skinned genius behind the world’s most famous mirror trickery, the one and only Jan van Eyck was a real fan, notoriously saying on his deathbed in July 1441 “Damn, what an oil!”. Oh Jan, blaspheming on your deathbed like that is not a good idea! Enough digressing… By the time of the 15th century most artists had had enough of egg tempera and had moved on to walnut oil. As an oil it was and is often preferred as a binder for whites as it yellows less than linseed oil, meaning paler and colder colours mixed with it change less when dry. It is often remarked that walnut oil has a distinct texture and flow, silkier, and softer than that of other oils and the effect of this is evidenced by the works of masters like van Eyck whose works is indeed, silky, soft and ravishingly detailed. If you are one who enjoys painting on wooden panels with brilliantly glossy paint then walnut oil is very much for you.. This unique creaminess and coolness could be just what you have been looking for after all these years!  

Poppy oil is similar to walnut oil in that it does not yellow like linseed oil does (this is why white paint is commonly made with these oils). Poppy oil is naturally colourless or lightly straw coloured and gives a brilliant appearance to a painting. Unlike the other oils, poppy oil dries matt and has a very slow dry time of about four to five days. This latter feature is useful for travelling artists who work outdoors and may return to a spot a few times over a holiday. Drying matt means that the oil can attract dirt and dust, and thus, if you can it is worth drying your painting as close to the ceiling as possible (cobwebs dusted away). Poppy oil is best used for direct, simple, alla prima techniques rather than complex, multilayered methods which are better done with linseed oil. This is because the oil has a tendency to crack when painted over reactive pigments (this is a key difference between poppy and walnut oil, the latter being less likely to crack when painted over). However, as a crazy sidenote – all this chat about cracks makes cracks seem bad, but are they always? Looking at Harold Sohlberg’s painting of a cabin in the forest, the cracks make the painting, giving it an incredible eerie feel! Just saying! Lastly, poppy oil is excellent if you are just beginning to learn how to make your own paints. It is the easiest oil to make paints with whilst also giving your paints a delicious buttery consistency. 

A final point is that the quality of your oil matters. If you are serious, do not, for example, buy linseed oil from a hardware shop, it will be very impure. Similarly, cheaper paints are more likely to yellow and crack than more expensive ones (not to mention lack of pigment) for example Georgian, which is great for students and experimentation, will undoubtedly degrade, yellow and darken with age, whereas the premium brands will not, or are much less likely to do so!

The end, voila, have fun!

By Ned Elliott

Posted on

How “Green” is Green and Stone?

As a morally infallible artist it was only natural for me to join the protesters at Extinction Rebellion on Easter Sunday. Sat amongst the crowd having watched Greta Thunberg’s short and sweet speech I was urged to take part in the chant “We love you”. Sadly, as a cripplingly uptight young man these three words were too much for me and I quietly ate some bread instead. Having seen this inspiring young lady I emerged a climate-oriented me and cycled home on my non-carbon-emitting-two-wheeled-iron-horse. Whilst cycling with my head held high and illuminated by my newly acquired halo I couldn’t help but consider Green and Stone’s eco credentials. I knew that we recycled most of our rubbish (because I ALWAYS put it out! Rosie! I’m looking at you!) and I knew that our carrier bags are biodegradable, but I was sure there was more. So, I visited my local ashram and pondered, “How green is Green and Stone?”.

The answer came quickly, and the truth is, it is a real struggle for an art shop to be 100% eco. As artist’s we make use of all sorts of terrible materials and minerals for absolutely no logical reason. It’s inescapable! But hey ho, one line of depressing news is one too many. As I say, we recycle, we have biodegradable bags, and fortunately amongst our stock there are many examples of eco-friendly items!

Amongst our selection of papers there are many which come from low-intensity, small scale, and environmentally friendly companies. Arguably, the most aesthetically pleasing papers we have in stock are, surprise, surprise, also the most eco-friendly! The paper I speak of, is the paper of Japan, India, Nepal, and Bhutan.

The papers of Japan are mostly made in the mountains where the climate is cold and the water is pure. The chilly climate means the ingredients to make the paper do not decompose whilst it also strengthens and contracts fibres, thus resulting in papers of a crisp, firm, and fresh appearance. Instead of using chemicals for bleaching, these paper-makers utilise the natural bleaching of the sun and of the river, the latter of which sees plant fibres left to whiten in clean and nippy shallow river beds. By using the river, the paper also picks up particles of mica which will let the paper sparkle just like the river from whence it came.

Most Japanese papers use kozo or paper mulberry fibres which are harvested sustainably. The result is a variety of papers with an inherent strength, warmth, softness, eloquence and attractiveness. Lens tissue and Tosa Washi are incredible examples of delicacy and strength, whilst Atsukuchi is a paper with a unique warm yellow hue. These papers are ideal for printmaking, but can also be used for pen and ink drawing, scrapbooking, bookbinding, and all sorts of experimenting!

Green and Stone’s Indian papers are similarly ecologically conscious. They are called Khadi papers, and they were inspired back in the 1920s by Gandhi’s Swadeshi movement which encouraged the resurgence of indigenous Indian craft and promoted the rights of Indians to embrace their own industries. These papers are very different to the Japanese papers which tend to be light and refined. Instead, Indian papers are robust, perhaps less delicate pieces of craft, but nonetheless they are very beautiful, and good for the planet.

The rag papers are made from 100% cotton rag which is recycled from t-shirt cuttings. Despite the rustic look, Khadi rag papers are still acid free with a pH neutral size thus making the papers supremely excellent for watercolour, gouache, and ink. The interesting texture of the paper also lends itself to expressive, organic drawing. Oil paint is even suitable if you prime the paper with acrylic gesso!

Other papers in our Indian Khadi collection include the delectable khadi coloured papers, which come in one of the most beautiful shades of magenta, and are excellent as wrapping up paper or general crafting. They too are eco-friendly, being made with dyes which meet European standards on toxicology. The eventual intention of the Khadi paper company is to reduce or entirely avoid the use of dye by recycling t-shirts of certain colours for certain papers. We also sell hemp papers made from sunn hemp, a native fibre used in India in the past for rope making. These are heritage papers made using traditional methods with the consciousness of nature in mind.

Bordering India are the mountain countries of Nepal and Bhutan. Nepalese and Bhutanese papers are made from the inner bark fibre of lokta plants that grow in the forests of the Himalayan foothills. The plants are harvested every three to four years, and are allowed to re-grow from their main root, thus meaning less disruption of soil and greater biodiversity. These Nepalese papers are the only papers made in Nepal using soda ash instead of harmful caustic soda. The run-off of this soda ash can then be used as a fertiliser so the environmental impact is actually positive! These methods have hardly changed for over one thousand years. The papers are an excellent example of the Buddhist reverence for the nature, from which we can learn much!

Beyond paper we are also proud stockists of St Eval candles. This company, based in Cornwall, takes the environment very seriously indeed. They not only re-use packaging, source FSC Certified paper, and reduce plastic-use generally. Their energy sources for production include wind turbines, solar panels and biomass boilers. On the farm on which they are based they have worked with the RSPB to create a network of mixed arable fields, wildflowers meadows and hedgerows to sustain populations of insects and bees. This all means that St Eval candles, which smell so heavenly, are close to being a completely carbon neutral company! Something one can only salute!

The final exemplar of small-scale excellence is Mr. Abraxas who makes Abraxas Inks. Yes, these inks, which are made solely with natural materials are all made by one man. Not only are they unsurpassed in terms of the aesthetics of their packaging, their colour is incomparable. The range includes oak gall inks, saffron and carmine inks, and pure vegetable inks. They are all mixed by hand! By a wizard (maybe!). They are completely non-toxic and are produced on a base of pure water. If you really wanted to, you could probably drink them. But what would be the point…

So, whilst it is nearly impossible for Green and Stone to call itself an eco saint we do at least try! We are very proud to sell these eco-friendly products, but there are many products I haven’t mentioned; other papers, other inks, other gifts. But what I should also say is that almost all our stock, even if they use not-the-nicest materials comes from small-scale suppliers whose carbon footprint is always going to be much smaller than those of larger corporations whilst also providing a higher quality, typical of people who really care for what they do!

And my last point is, don’t pour turpentine down the sink!

By Ned Elliott

Posted on

The “Canvas” Room

The canvas room at Green and Stone is a bit of a misnomer, because in it you find much more than only canvas. Undoubtedly though, it is the product with greatest primacy, and as soon as you enter the room you will notice the shelves full of Belgian and French ready-made canvases, and the piled rolls, short and long, of cotton duck, linen, and jute, unprimed and primed – a collection which culminates in a room filled with the timeless perfume of linseed oil.

The selection of canvases at Green and Stone is of great variety. On the roll and sold by the metre we have eighteen different types including rustic and rough unprimed jute, 9oz and 12oz cotton duck, unprimed linen, all sorts of oil-primed and acrylic-primed linens ranging from the ultra-smooth double primed No.13, to the ruggedly grained Charvin.

Tucked away nearby to our canvases is our selection of kiln-dried pine stretchers. These come in three widths, 2 ¼”, 1 ¾” and 1 ¼” and range in length from the dainty five incher to the eighty-four-inch corker, suitable for anything from the tiniest landscape to the grandest portrait. If a length you are after is not in stock, custom made stretchers are also available!

In the middle of the room stands a collection of easels; travel easels, lyre easels, studio easels and table easels. Of the easels, the most exciting is the French box easel. The 19th century invention is a work of sheer genius akin only to nuclear fusion. Essentially, it is an inclinable easel attached to a box which itself is placed upon retractable legs. Truly, it is Heaven sent! Whilst primarily used by the plein air artist it is also very suitable for an artist with a limited work space. With its nifty design it can hold both small and large canvases whilst also containing all of your brushes and paints. When you are finished in the field, sufficiently sunburnt and tired of the painting that was intended to relax you, the easel neatly folds down to a box. Some people complain the French easel is too complicated to set up and take down, but I regard it as a satisfying challenge, and when returned to its cuboid form its physical solidity can help reaffirm the artists’ fragile sense of self – and frankly, no other easel so excellently holds a canvas, all of your paints, a palette, remains sturdy and rigid whilst out in the field, and is very camper-chic. The French box easel thankfully comes in two sizes, one full, one half, with the half being an elongated box, so there is simply no reason for you not to have one.

If however, you prefer the idea of a simpler, less all-encompassing easel – perhaps, because unlike me you cannot face the challenge! – there are various others in the canvas room to select from. These include lightweight watercolour easels weighing as little as a kilo or the multipurpose and supremely well-priced St Paul’s sketching easel. This easel – for some reason named after Paul the Apostle (if anyone has an answer please email answers4ned@gmail.com) is easy to set up, comfortable to carry, comes with a sartorial strap, and though less solid and comprehensive is cheap, cheap, cheap! If you are blessed to be able to splash a little more cash the Mabef (Made in Italy) sketching easel is a larger and hardier equivalent able to take bigger canvases. For the student there are also various H and A frame studio easels, or for the established artist there are our exquisite and grand French-made oak studio easels. Amongst the new, there are also the old, and so in the canvas room there is also an ever changing collection of antique easels.

Adding colour to the canvas room is the card stand which not only includes a rainbow range of thirty delighting shades of Canford Card, but also glittery, shimmery, and pretty craft card. Similarly, our mountboard comes in such a dazzle of colours your mood board plans might be thrown into the air. If you are one of these interior designers who like to use mood boards, you then only need to turn your head to also see our foam board and portfolios. The room is filled with all sorts of folios suited to presenting all your fabulous work to friends and clients. These folios include very smart black numbers, and more funky retro portfolios with jazzy faux marbled covers.

There is much more in the canvas room; trestle tables, porte cartons, and all sorts of artists’ materials and equipment including ready-made gesso, rabbit skin glue (in flake or jelly form), marble dust, whiting, carrageen moss, staples, and much, much more. The truth is, words cannot do the room justice. So come and see it for yourself!

By Ned Elliott